Note: This post was updated September 14th 2021 with the latest information and screenshots.
Centrally managing Microsoft Teams Room devices is a must, especially if you’re in charge of a large fleet of devices, spread across multiple locations.
In this series, we’ll look at how you can use Microsoft Intune to manage MTR’s. In part 1, we’re focusing on customised themes – the look and feel of the device.
A shoutout to Ben Reader (twitter: @powers_hell) too for the assistance with Intune!
Let’s dive in!
Be sure to check out the series of posts:
Managing a Microsoft Teams Room (MTR) Device with Intune – Part 1 – Theme
Managing a Microsoft Teams Room (MTR) Device with Intune – Part 2 – Updates
Managing a Microsoft Teams Room (MTR) Device with Intune – Part 3 – Configuration Profiles
Managing a Microsoft Teams Room (MTR) Device with Intune – Part 4 – Autopilot
Bits and Pieces You’ll need
There’s a few things you’ll need to ensure you have in place first:
- At least one Windows Based Microsoft Teams Room Device (MTR)
- An Office 365 tenant
- Suitable licensing for Microsoft Teams and Intune – more on this below
- Azure subscription – You can sign up for $200 free credit to get you started
Getting things set up
First things first, I’m starting with an out of the box Microsoft Teams Room (MTR) device. I’ll be using a Logitech TAP, but the actions apply to any windows-based MTR.
MTR Room Account
Our MTR will need a room account created for it within Office 365. The exact steps to create your room account will vary depending on if you’re purely within Office 365, or if you’re currently syncing from on premises AD.
Microsoft have the steps to create a room account documented here: https://docs.microsoft.com/en-us/microsoftteams/rooms/rooms-configure-accounts
Licensing the MTR
There are a number of ways to license an MTR for Intune:
- Meeting Room license
- Microsoft 365 E5 license
- Intune Device license
The simplest (and most cost effective) is to license your MTR with a meeting room license. This license grants the device:
- Teams
- Phone System
- Audio Conferencing
- Microsoft Intune
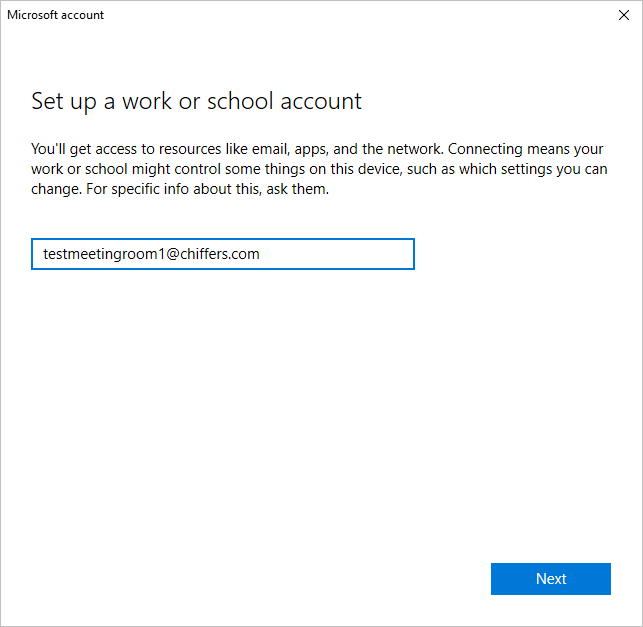
In this example, I’m going to be licensing my test meeting room:
testmeetingroom1@chiffers.com
Licensing an Intune Administrator
To administer Intune, you’ll also need to grant an Intune license to one or more Intune Service Administrators (or Office 365 Global Tenant Administrators).
Again, there are a number of ways to achieve this. The easiest is to apply a Microsoft 365 E5 license to the administrator, or purchase a separate Intune license. You can even apply a 30 day M365 E5 trial license.
In my example, i’ve created a temporary admin account called trial-admin@chiffers.com and have assigned it a trial M365 E5 license.
![]()
Note that if you don’t license an Intune Administrator and attempt to access the Intune portal (endpoint.microsoft.com), you’ll see various 403 access denied errors.
This account does not need global tenant administrator rights, but does need to be assigned Intune Admin rights, under Manage Roles > Devices under Users in the Office 365 Admin Center.
Setting up an Azure storage account
We need to set up a Storage Account in Azure to host our XML settings file and customised desktop background image.
To set the storage account up:
- Sign in to the Azure portal at https://portal.azure.com
- Search for Storage Accounts
- Click Create
- Fill out the Project Details.
You’ll more than likely need to create a new Resource Group, if you don’t already have a suitable one.
You’ll note too that I’ve changed the replication to Locally-redundant storage (LRS). There’s no need to have a geo-redundant storage platform for this use case.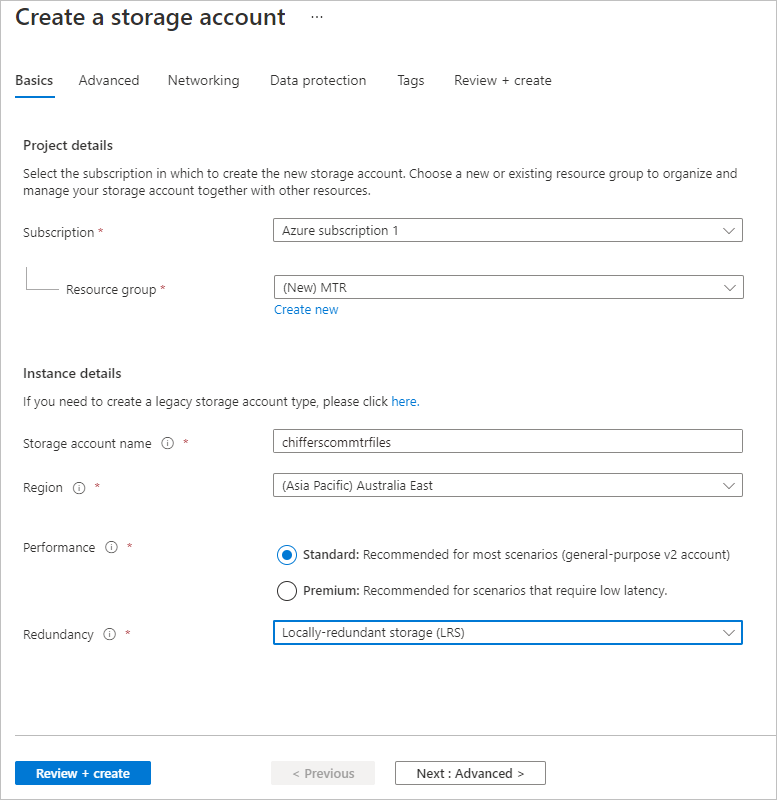
- When ready, click Review + create to create the storage account.
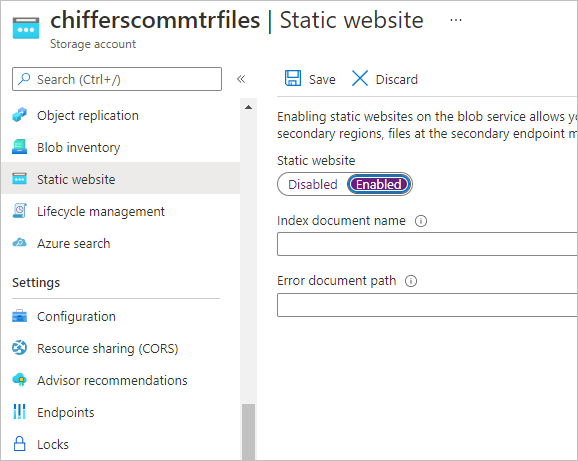
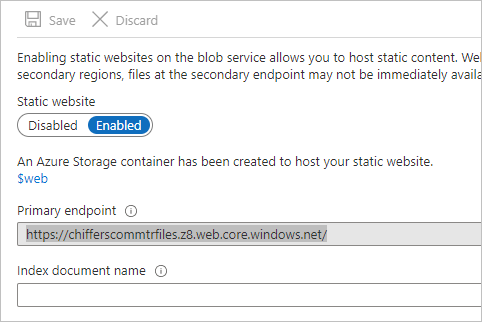
Note: Keep in mind that at this point, you’re creating a publicly accessible blob storage account. Don’t put anything on this storage that the general public shouldn’t have access to. - Once created, Open Static Website, select Enabled and click Save to turn this feature on.
- Make a note of the primary endpoint URL (this will appear after clicking save) – we’ll need this later in our PowerShell script.
Securing Our Storage Account
Right now, our storage account’s web page (and anything we store on it) is accessible by anyone on the web.
Before we go any further, let’s secure this web site so that only our IP can access it.
- Click Networking
- Select Selected Networks under Allow access from and then add the public IP addresses where your MTR’s will access the internet from under Firewall > Address Range. You can also tick Add your client IP address to add your current public IP to the allowed list.
Tip: browse to www.whatismyip.com from your MTR device to check its public IP address.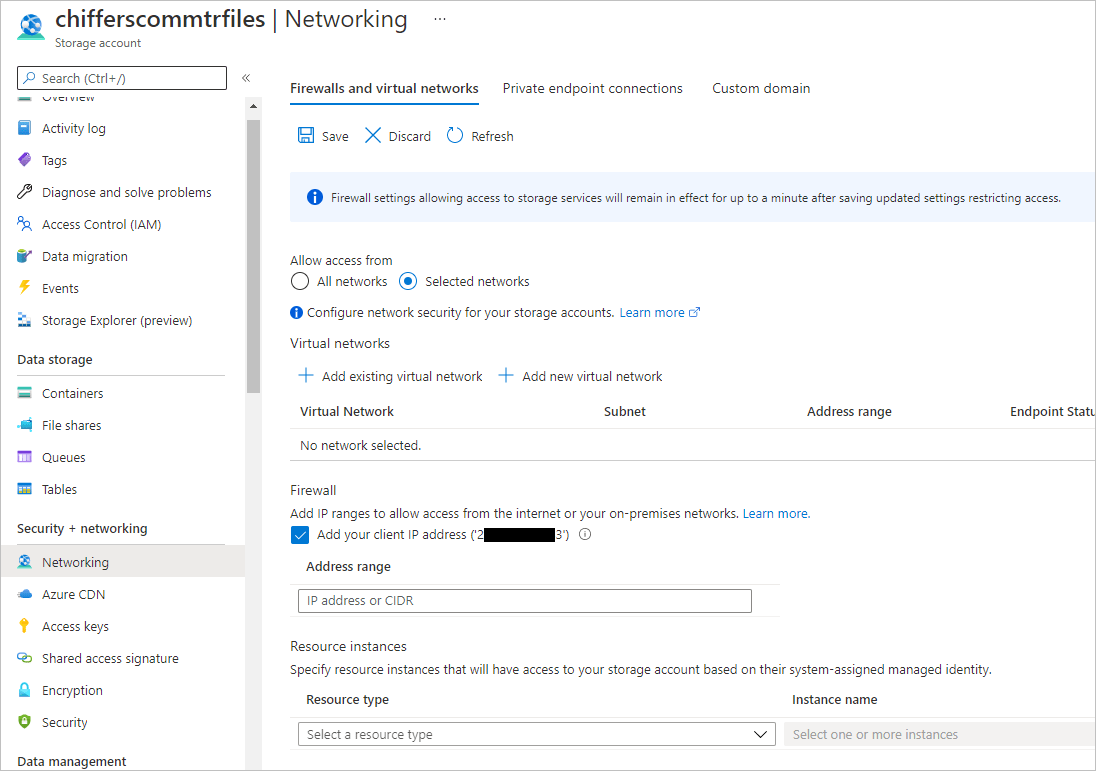
- When ready, click Save
Configuring our custom theme settings
To configure various settings on your MTR devices, you’ll need to create an XML file with those settings contained within. You must name your XML file SkypeSettings.xml
Microsoft have documented all available variables that you can control within the XML file here: https://docs.microsoft.com/en-us/microsoftteams/rooms/xml-config-file
In this example, we’re going to be configuring the following settings via the XML file.
- Auto screen share
- Hiding the name of the meeting
- Setting Teams as the default client
- Enabling Bluetooth beaconing
- Disabling auto accept for proximity Join
- Enabling support for SfB meetings
- Enabling support for WebEx meetings
- Enabling custom info for third party meetings
- Disabling dual screen mode
- Where to send log files via email
- Custom Theming
We can safely remove the settings that we don’t want/need from within the file, so long as we keep the formatting the same, as well as the <SkypeSettings> </SkypeSettings> tags at the start and end of the file.
Here’s my XML file: (original xml file here)
<SkypeSettings>
<AutoScreenShare>true</AutoScreenShare>
<HideMeetingName>true</HideMeetingName>
<IsTeamsDefaultClient>true</IsTeamsDefaultClient>
<BluetoothAdvertisementEnabled>true</BluetoothAdvertisementEnabled>
<AutoAcceptProximateMeetingInvitations>false</AutoAcceptProximateMeetingInvitations>
<SkypeMeetingsEnabled>true</SkypeMeetingsEnabled>
<TeamsMeetingsEnabled>true</TeamsMeetingsEnabled>
<WebExMeetingsEnabled>true</WebExMeetingsEnabled>
<UseCustomInfoForThirdPartyMeetings>true</UseCustomInfoForThirdPartyMeetings>
<CustomDisplayNameForThirdPartyMeetings>Craig's Conference Room</CustomDisplayNameForThirdPartyMeetings>
<CustomDisplayEmailForThirdPartyMeetings>testmeetingroom1@chiffers.com</CustomDisplayEmailForThirdPartyMeetings>
<DualScreenMode>false</DualScreenMode>
<DuplicateIngestDefault>false</DuplicateIngestDefault>
<SendLogs>
<EmailAddressForLogsAndFeedback>mtrfeedback@chiffers.com</EmailAddressForLogsAndFeedback>
<SendLogsAndFeedback>true</SendLogsAndFeedback>
</SendLogs>
<Theming>
<ThemeName>Custom</ThemeName>
<CustomThemeImageUrl>mtr-wallpaper.jpg</CustomThemeImageUrl>
<CustomThemeColor>
<RedComponent>100</RedComponent>
<GreenComponent>100</GreenComponent>
<BlueComponent>100</BlueComponent>
</CustomThemeColor>
</Theming>
</SkypeSettings></SkypeSettings>
Custom Background Image
Our custom background image that will be displayed on the room’s displays needs to be exactly 3840×1080 pixels, and either a JPG, PNG or BMP.
Note that if the room only has a single display, by default the right hand side of the entire image will be displayed on the in-room displays. Dual display rooms will display the full image stretched across both displays.
Microsoft have produced a custom theme Photoshop template that can help you design your custom background, ensuring you don’t put graphics over on screen elements like the time.
I’m using a free wallpaper file in this example: mtr-wallpaper.jpg
You may wish to add information that users within the room may find useful such as some basic info on using the room, and the helpdesk number to call if there are any issues.

Now that we have our background image file, and SkypeSettings.XML file we can upload these to our Azure Storage account using the Azure Storage Explorer
- Within your storage account in Azure, select Overview > Open in Explorer

- Within the Storage Explorer app, expand out your storage account, blob containers, $web
Upload your background image, and SkypeSettings.xml file here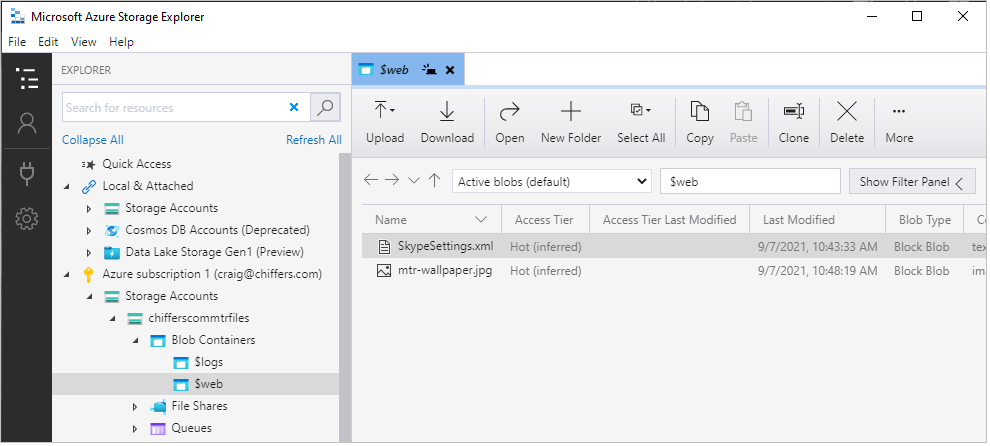
Deploying the theme via PowerShell
We need a way of getting our SkypeSettings.xml file, and our custom background image on to each of our MTRs.
To do this, we can use Intune to run PowerShell on each of our MTRs to connect to our storage account, download our SkypeSettings.xml and mtr-wallpaper.jpg file and place them in the correct location on the MTR.
Here’s our script: (original file here)
Invoke-WebRequest -Uri "https://chifferscommtrfiles.z8.web.core.windows.net/mtr-wallpaper.jpg" -OutFile "C:\Users\Skype\AppData\Local\Packages\Microsoft.SkypeRoomSystem_8wekyb3d8bbwe\LocalState\mtr-wallpaper.jpg"Invoke-WebRequest -Uri "https://chifferscommtrfiles.z8.web.core.windows.net/SkypeSettings.xml" -OutFile "C:\Users\Skype\AppData\Local\Packages\Microsoft.SkypeRoomSystem_8wekyb3d8bbwe\LocalState\SkypeSettings.xml"
you’ll need to edit the locations in red text to point towards your Azure Storage URL that you took note of earlier.
Be sure to leave the path to C:\Users\Skype\AppData\Local\Packages\Microsoft.SkypeRoomSystem_8wekyb3d8bbwe\LocalState\ as it is.
We’ll save this PowerShell script as mtr-custombg.ps1 on our local machine.
Note: A previous version of this post included the below script. This script no longer works, so please use the script above instead.
Old Script (no longer works)
$WebClient = New-Object System.Net.WebClient$WebClient.DownloadFile("https://chifferscommtrfiles.z8.web.core.windows.net/mtr-wallpaper.jpg","C:\Users\Skype\AppData\Local\Packages\Microsoft.SkypeRoomSystem_8wekyb3d8bbwe\LocalState\mtr-wallpaper.jpg")$WebClient = New-Object System.Net.WebClient$WebClient.DownloadFile("https://chifferscommtrfiles.z8.web.core.windows.net/SkypeSettings.xml","C:\Users\Skype\AppData\Local\Packages\Microsoft.SkypeRoomSystem_8wekyb3d8bbwe\LocalState\SkypeSettings.xml")
Upload the script into Intune
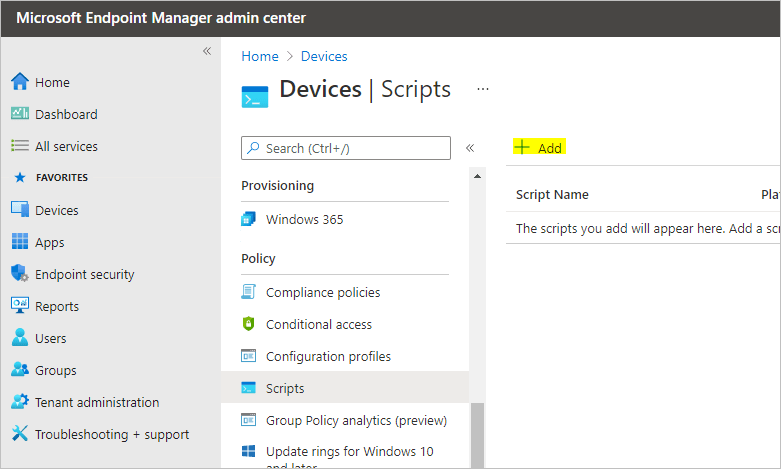
Now we need to upload the script into Intune.
- Sign in to the Intune portal: https://manage.microsoft.com
- Select Devices > Scripts
- Click Add > Windows 10 or later
- Give your PowerShell script a name, and click Next
- Upload your mtr-custombg.ps1 file under Script Location

- Click Next
- On the Assignments page select Selected Groups and choose the group that contains your MTR Devices from the list – for now, our MTR wont be in this list as we haven’t Azure-AD joined in yet.
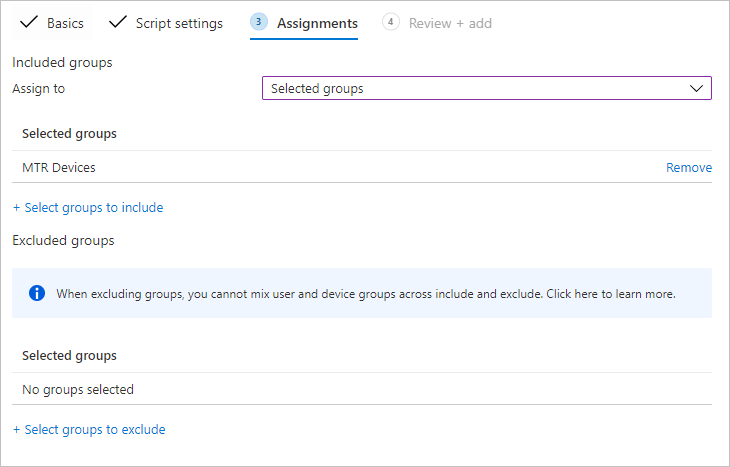
This group should contain each of your MTR device computer names. - When ready, click Add to add your script.
Note: Any time you make a change to the script, you MUST change the filename of the script so that Intune knows the file has changed, and to re-run it on the MTR device again.
Configure Intune Automatic Enrollment
If you have the correct Azure AD Premium licensing in place, you can use Intune auto enrollment to automatically enroll any Azure AD-joined machine to Intune.
If you don’t have the licensing in place, or want to enroll machines manually, you can skip this step.
- Sign in to the Intune portal: https://endpoint.microsoft.com
- Expand Devices > Enroll Devices > Automatic Enrollment
- Set the MDM User Scope to All (unless you specifically don’t want to add all Azure-AD joined devices to Intune).
- Leave MAM set to none
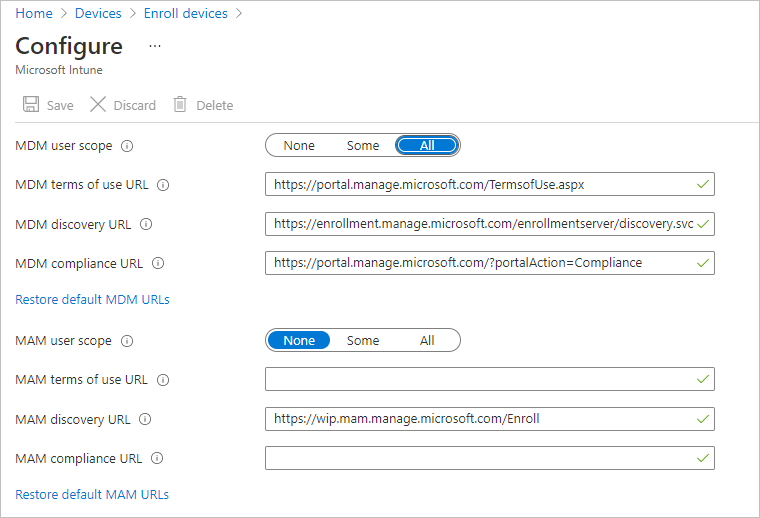
- Hit Save
Note: If you don’t want all Azure AD joined machines to automatically enroll in Intune, you can select Some instead, and then target a security group that contains the user accounts you wish to target for Intune enrollment (ensure this group targets users, not devices).
Azure AD Join your MTR
Lets go ahead and Azure AD join our MTR:
- Log in to the local admin account on the MTR (username: .\admin password: sfb)
- Open Settings > Accounts > Access work or School
- Click Connect
- Sign in using your Office 365 meeting room account details (e.g. testmeetingroom1@chiffers.com) – this account MUST be licensed with Microsoft Intune. you could also use an Intune DEM account here instead, if you wish.
- After a few moments, your MTR will be joined to Azure Active Directory. If you have enabled automatic enrollment for all devices, your MTR will be automatically enrolled in Intune too.
Now we need to add our MTR to our MTR Devices group in Azure AD:
- Open the Azure Active Directory Portal > Groups > MTR Devices (or what ever you’ve named your group)
- Add our newly Azure-AD joined device into this group.
Two Extra Steps if you don’t have automatic enrollment enabled in Intune:
- Open Settings > Accounts > Access work or School
- In the sign in screen that appears, enter your meeting room account details again and sign in (e.g. testmeetingroom1@chiffers.com)
Once you have enrolled the device in Intune, you’ll need to wait a while for the device to connect to the Intune service and download the Microsoft Intune Management Extension.
This extension will then automatically run the PowerShell script, pulling down the SkypeSettings.XML and mtr-wallpaper.jpg file to the MTR.
Test!
Now that everything is in place, let’s test to make sure everything is working as expected
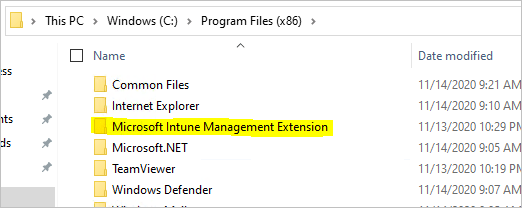
- Log in to your MTR as a local admin.
- Open Windows Explorer, and browse to c:\program files (x86)
- Check to ensure that the Microsoft Intune Management Extension folder exists
 \
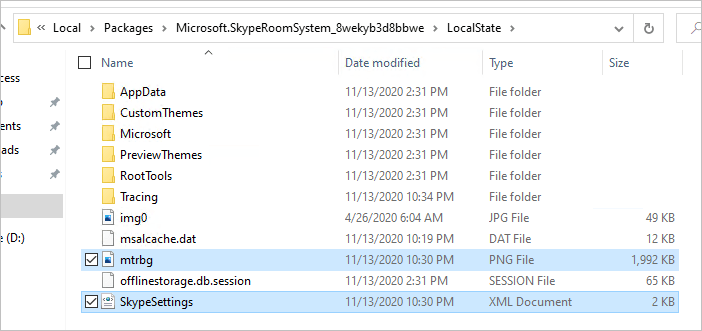
\ - Next, browse to C:\Users\Skype\AppData\Local\Packages\Microsoft.SkypeRoomSystem_8wekyb3d8bbwe\LocalState and confirm that mtrbg.png and SkypeSettings.XML exist within the folder
- Restart the MTR and confirm that the new background image is displayed on the in room displays
Making Changes to the Theme
From time to time, you’ll more probably want to update the theme and push those changes out to your MTRs.
To ensure your changes appear on your MTR devices, it’s important to understand how often Intune runs PowerShell scripts.
The Intune management extension agent checks with Intune once every hour and after every reboot for any new scripts or changes. Once the script executes, it doesn’t execute again unless there’s a change in the script or policy. If the script fails, the Intune management extension agent will attempt to retry the script three times for the next 3 consecutive Intune management extension agent check-ins.
This means that if you wish to publish a new MTR background image, you’ll need to upload the image to your Azure Storage Account, and then re-upload your PowerShell script into Intune – even if your script hasn’t had any changes made to it.
Be sure to name your new MTR background image differently to your current image too – I’ve noticed that if the old and new image names are the same, they don’t update.
If you’d like to read up further on PowerShell scripts and Intune, Microsoft have documented the process here: https://docs.microsoft.com/en-us/mem/intune/apps/intune-management-extension
Troubleshooting
One of the most common issues that can occur is that the Intune management extension agent does not install on the MTR.
To solve this problem, first ensure the device is both Azure-AD joined, and enrolled correctly in Intune.
Next, ensure you’ve waited enough time (at least an hour) for the Intune management extension agent to download and install on the device.
Another common issue is that the theme doesn’t apply. Be sure that your SkypeSettings.XML file contains the correct file name and extension for your wallpaper file, and that your PowerShell script contains the correct URL to download the file from your Azure storage account. Check too that you can browse to the storage account from the MTR.
Regedit
Downloaded intune policies are stored within the Registry in the following location:
Computer\HKEY_LOCAL_MACHINE\SOFTWARE\Microsoft\IntuneManagementExtension\Policies\

Expanding the keys under Policies, you can drill down and see the current status (ResultDetails) of your PowerShell script. In the above example, we can see that the script experienced an issue downloading files.
The DownloadCount shows the number of times the script attempted to run (3 in the above example).
A script will run once per check-in period. If the script successfully runs, it will never run again. If the script fails, it will retry up to 3 times before failing and stopping forever.
We can force a re-run of the above script by updating the DownloadCount to 0, and setting Result to blank and then restarting the Intune Management Extension service. Note though that this will only re-run the currently downloaded script. If you’ve made changes to your PowerShell Script (and renamed it!), you’ll need to wait for the next Intune check-in for the new script to be downloaded to the machine and then ran.
Final Thoughts
Managing your MTR deployment via Intune is straightforward, and enables you to have greater control of the end user experience.
Questions/comments – be sure to leave them below!
Be sure to check out the series of posts:
Managing a Microsoft Teams Room (MTR) Device with Intune – Part 1 – Theme
Managing a Microsoft Teams Room (MTR) Device with Intune – Part 2 – Updates
Managing a Microsoft Teams Room (MTR) Device with Intune – Part 3 – Configuration Profiles
Managing a Microsoft Teams Room (MTR) Device with Intune – Part 4 – Autopilot

Amazing article boss!!
I am doing a Microsoft Teams Rooms POC on Intune right. I wish I had found this last month.
Great work!! I am going to be testing out a couple of the config’s you have documented.
A great article. Am struggling to understand whether we need a specific Intune compliance policy for MTRs and what to set. In addition what settings to apply in configuration policies for e.g device restrictions as these devices have a lot of these settings already applied by the OEM.
Stay tuned! I’ll be posting a part two that will be covering these additional items soon.
Do you still need an E5 license for these? I found that just the Microsoft Teams Room License provides the device everything it needs. Or is the E5 a prerequisite for Intune?
If you’re assigning a meeting room license (standard or premium) to an MTR room, that’s all you need. The license includes teams and intune.
Just note, it is important to join the device to AAD not register to AAD/Intune.
Conditional access will not wok with a registered device so after “Connect” make sure the correct option is selected.
100% correct.
Does this mean that we have to select “Join this device to Azure Active Directory” under alternate options while adding the work account in order for these intune settings to work?
Hey Dilip,
Nope! You’d sign in rather than selecting one of those below options.
Thanks for all the content, you share so much valuable information. I am experiencing an issue with our MTR’s, when I invite the MTR to a Zoom meeting it accepts the invite but on the MTR touch panel the Zoom meeting shows up a Teams meeting.
Have you ever seen this issue before? Any help would be greatly appreciated. Thanks
How’s the invite getting to the room?