Welcome to part 3 of managing Microsoft Teams room devices within Intune.
A shoutout to my colleague and good friend Steven Hosking (@OnPremCloudGuy) for his help with Bitlocker below!
Be sure to check out the series of posts:
Managing a Microsoft Teams Room (MTR) Device with Intune – Part 1 – Theme
Managing a Microsoft Teams Room (MTR) Device with Intune – Part 2 – Updates
Managing a Microsoft Teams Room (MTR) Device with Intune – Part 3 – Configuration Profiles
Managing a Microsoft Teams Room (MTR) Device with Intune – Part 4 – Autopilot
What are configuration profiles?
Configuration profiles are very similar to Group Policies – they let you control many different aspects of the operating system like blocking access to USB storage devices, or setting a custom background image.
Should I create configuration profiles for my MTRs?
Unless you have a specific requirement, my recommendation is to avoid creating overly restrictive configuration policies for your MTRs.
MTRs are essentially meeting room appliances, not a typical Windows 10 machine that an end user uses. The end user has no access to anything outside the MTR app, including no access to removable storage, programs, a web browser or files stored on the MTR or in the cloud.
Don’t apply your end user compute targeted Windows 10 configuration policy to your MTRs – you’ll break things.
What are the recommended profiles to configure for an MTR?
Typical use cases for configuration profiles include enabling Bitlocker to encrypt the local drive.
Add a new Configuration Profile
Let’s add a new configuration profile for our MTRs
- Select Device > Configuration Profiles > Create Profile
- From the blade that appears, choose Windows 10 or Later under platform, and select Templates under profile type
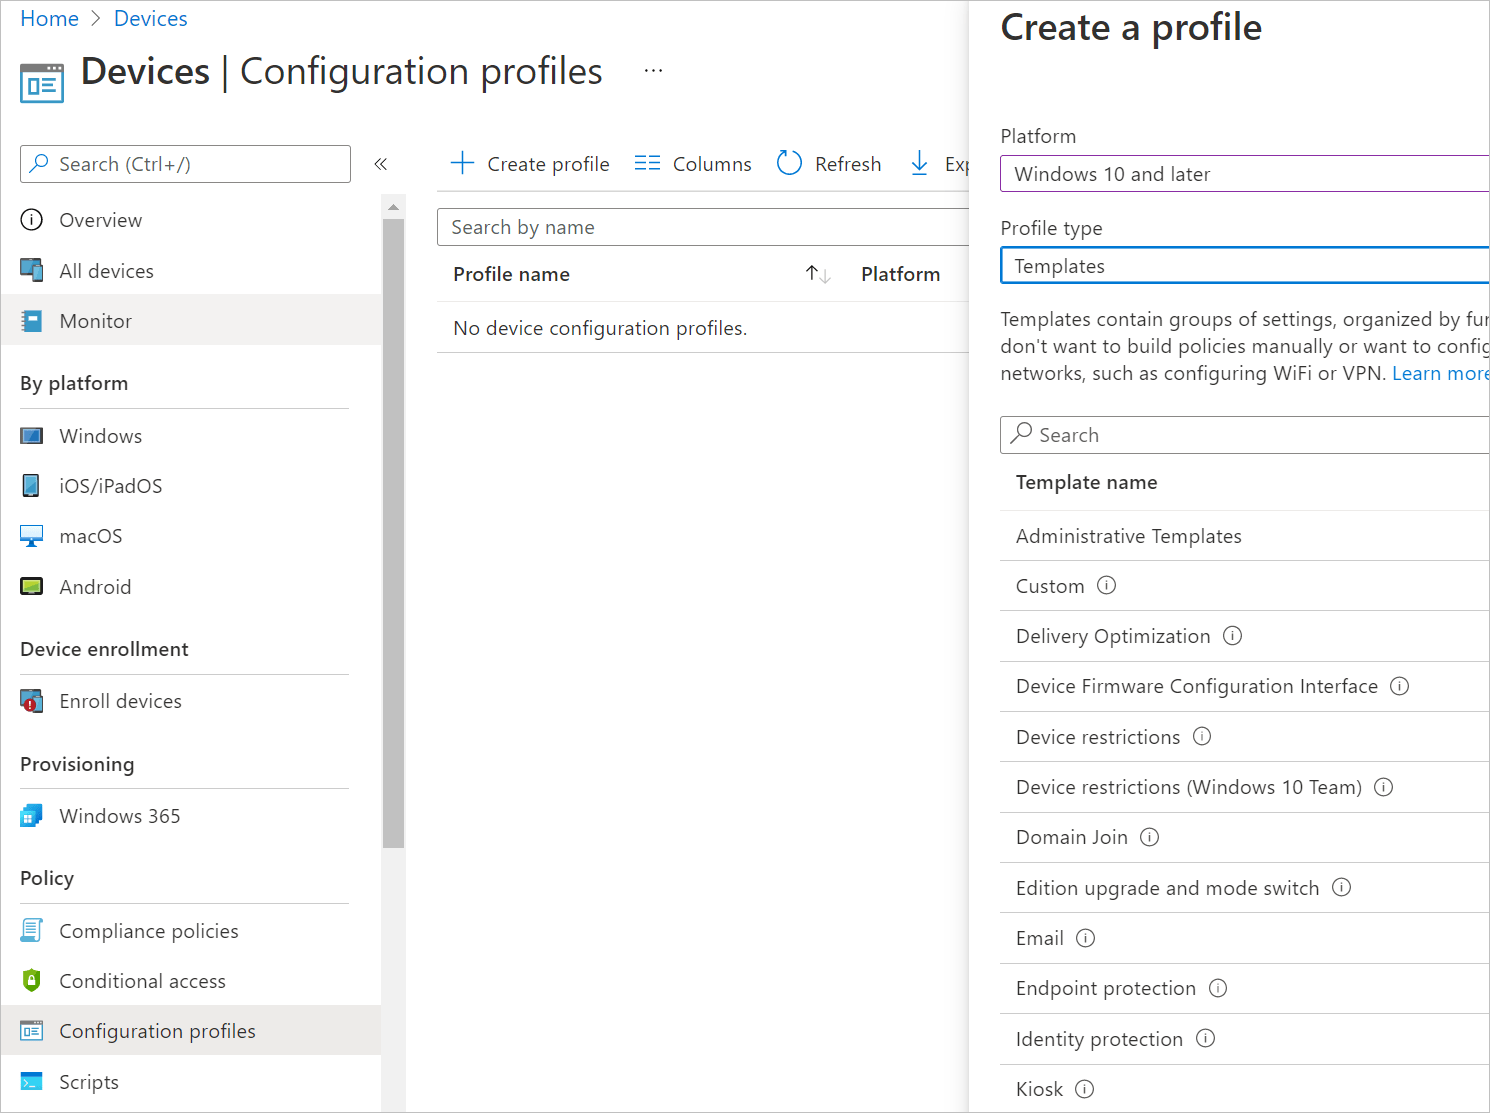
- Next, select the Template name you wish to configure.
Based on this post Managing Teams Meeting Rooms with Intune – Microsoft Tech Community from the Intune Support team, Microsoft recommend the following:
Template Name
Can you configure this template for MTR use?
Administrative Templates
Yes – Although I would not recommend this.
Certificates
Yes – if required within your environment.
Delivery Optimization
Yes – If you’d like to configure this within your environment.
Device Firmware Configuration Interface
Check for supported hardware here
Device restrictions
Yes – Although I would not recommend this.
Edition Upgrade
Not supported
Email
Not recommended
Endpoint Protection
Yes – You can enable bitlocker encryption.
eSim
Not supported
Identity Protection
Not supported
Kiosk
Not supported
Powershell Scripts
Yes (Devices need to be Azure AD or Hybrid Azure AD Joined
Shared multi-user device
Not supported
VPN
Not recommended
Wi-Fi
Not recommended (Some devices to have Wifi built in to them, but its always best to cable them into the network via Ethernet.
Windows Information Protection
Not recommended
- Once you have selected the template you wish to configure give the template a meaningful name
- Configure the profile
- Assign the profile to your MTR device group and click create.
My Environment Recommendations
In my test environment, I have Bitlocker enabled, as well as remote desktop and remote PowerShell (although these two aren’t necessary as you shouldn’t ever need to RDP to the MTR itself (admin profile only), and you can run PowerShell scripts via Intune).
Here’s how I enabled these settings:
Enabling Bitlocker
Most people like to ensure Bitlocker is enabled on their devices within their environment.
If you’re wanting to enable Bitlocker on your MTR devices, check first that your MTR supports TPM 2.0 (you can check this by running tpm.msc on the device under admin mode) and that UEFI boot is enabled in the BIOS.
To enable Bitlocker on the MTR, we’ll create a configuration profile:
- Sign in to the Intune portal at https://manage.microsoft.com
- Under Devices > Configuration Profiles click Create Profile
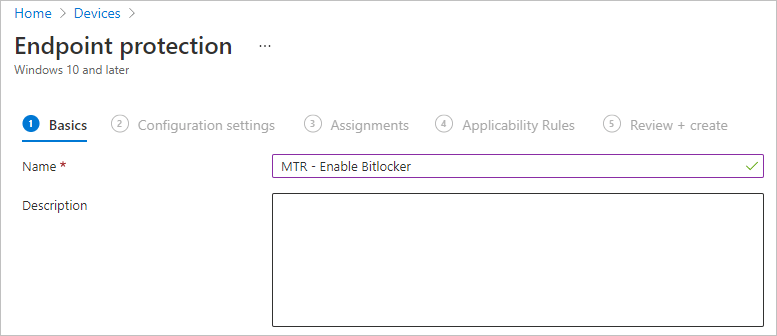
- Select Windows 10 and Later and Templates then choose Endpoint Protection from the list and click Create

- We’ll give our new profile a name
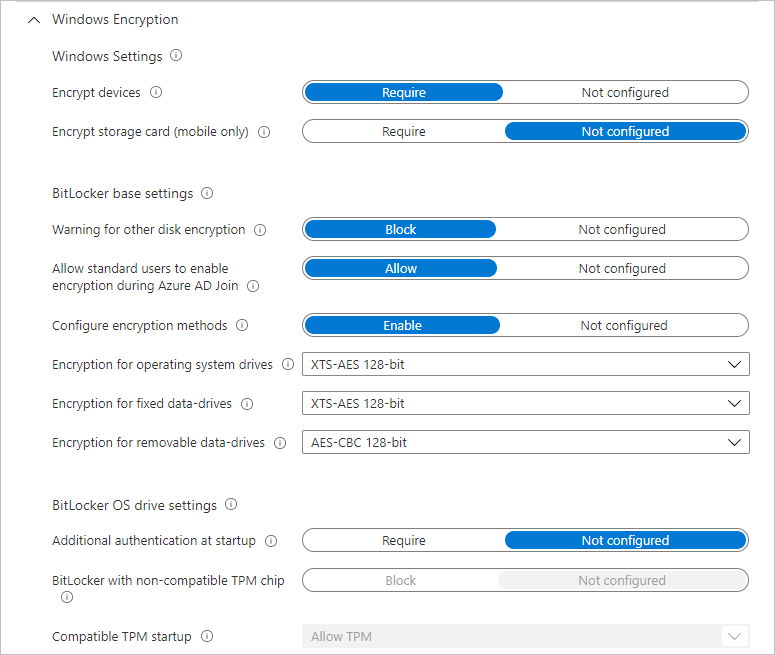
- Next, under Configuration Settings > Windows Encryption ensure the following is enabled/set. You dont need to enable/set anything further to enable Bitlocker base config
- We’ll assign our policy to our MTR Devices group
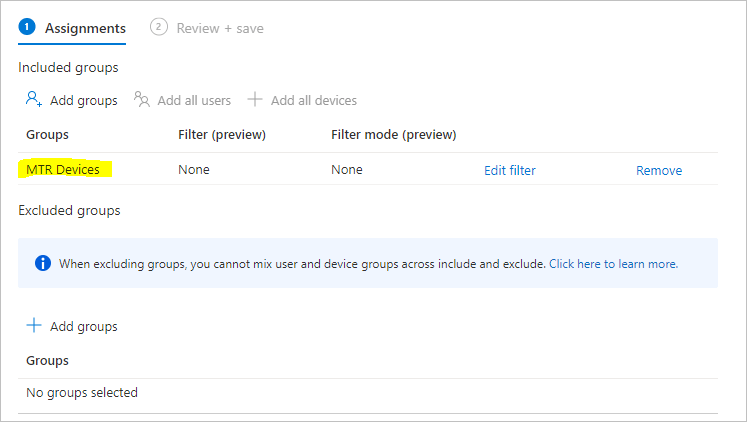
- We can skip past assigning any Applicability Rules as our group contains our MTR devices.
- Lastly click Create to create the policy
Enabling Remote Desktop and Remote Powershell
Although not required, you may wish to enable remote desktop to allow you to connect to the MTR’s admin login via RDP from your internal network. You may also wish to enable remote Powershell if you want to remotely run commands on the MTR – although generally speaking this isnt recommended as you can run PowerShell commands on the MTR from the Intune portal.
However, here’s how to enable these features through Intune if you wish to:
- Let’s start by creating a new Configuration Profile

- Under Configuration Settings select All Settings on the left, then search for “Remote Desktop”
- Select the Settings Name Allow Users to connect remotely by using Remote Desktop Services
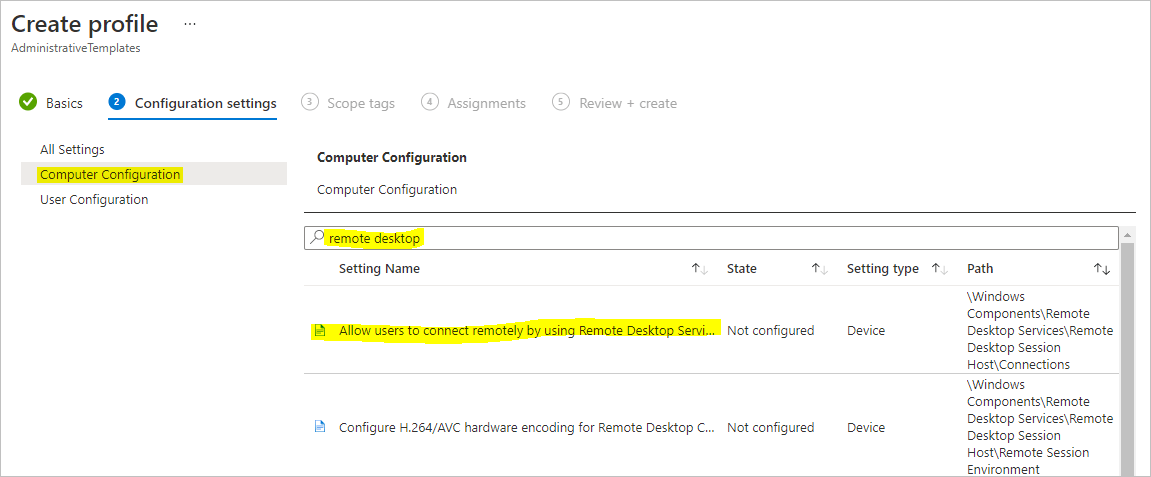
- In the pop out that appears, select Enabled and click OK

- Next, search for WinRM and select Allow remote server management through WinRM
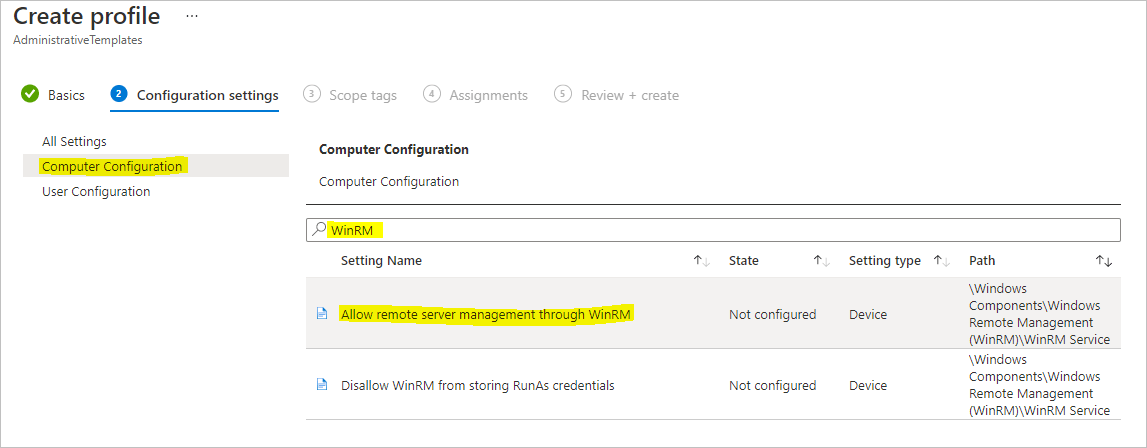
- In the pop out that appears, select Enable and then either enter * in IPv4 and IPv6 filter dialog boxes, or specify IP addresses/ranges that you wish to allow to connect to the MTR via remote PowerShell (these MUST be within your environment, and be Azure AD/Hybrid Azure AD joined).

- Click OK to save the changes.
- Click Next, and skip assigning Scope Tags.
- On the Assignments page, be sure to select your MTR Devices group and click Next
- Click Create to create and save the profile
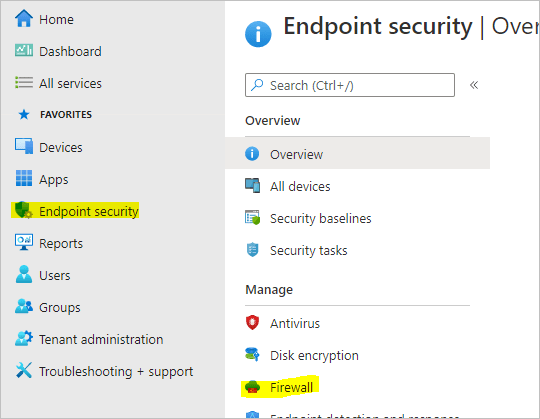
Now we need to go and create firewall rules to allow connectivity to our MTR
- Select Endpoint Security on the left, then select Firewall
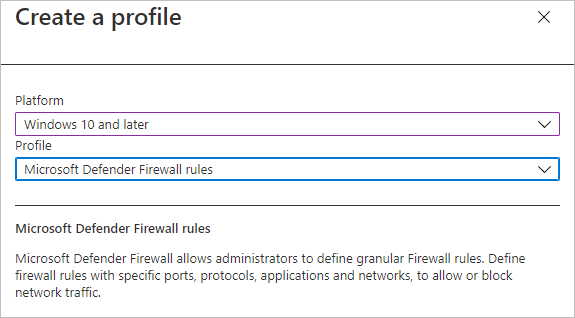
- Click Create Policy to create a new policy
- Select Windows 10 and Later and Microsoft Defender Firewall Rules and click Create
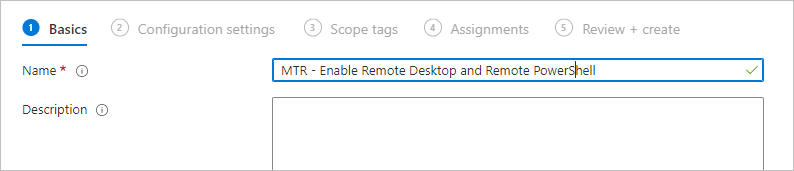
- We’ll give our firewall profile a name
- Under Microsoft Defender Firewall, click the arrow on the right to expand the list, and then click Add

- We’ll create our Allow RDP rule first:
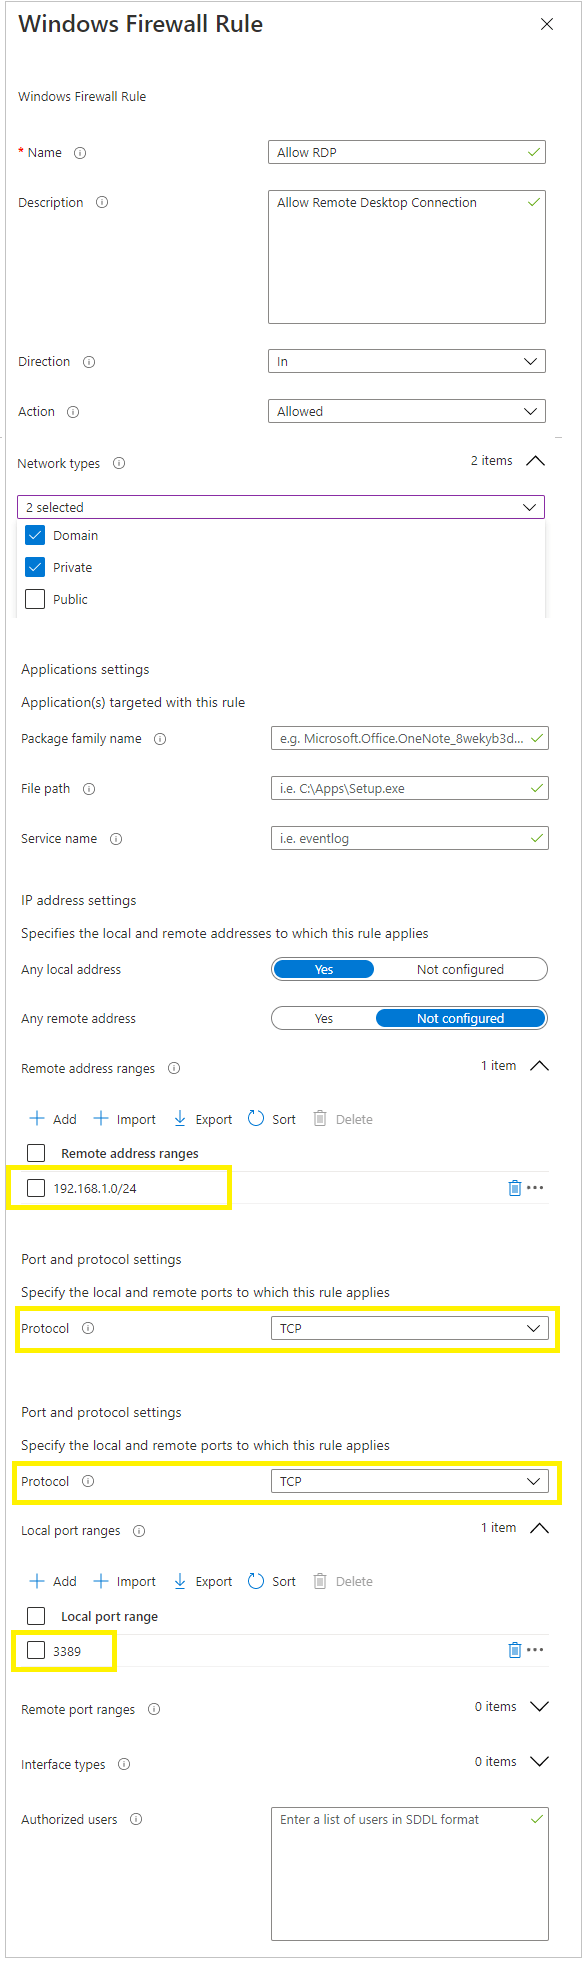
Note that i’ve specifically only allowed subnet 192.168.1.0/24 to access my MTR’s over RDP. - Sit Save to save the rule.
Now let’s create the Remote Powershell rule
- Click Add, and give the rule a name and add the following details:
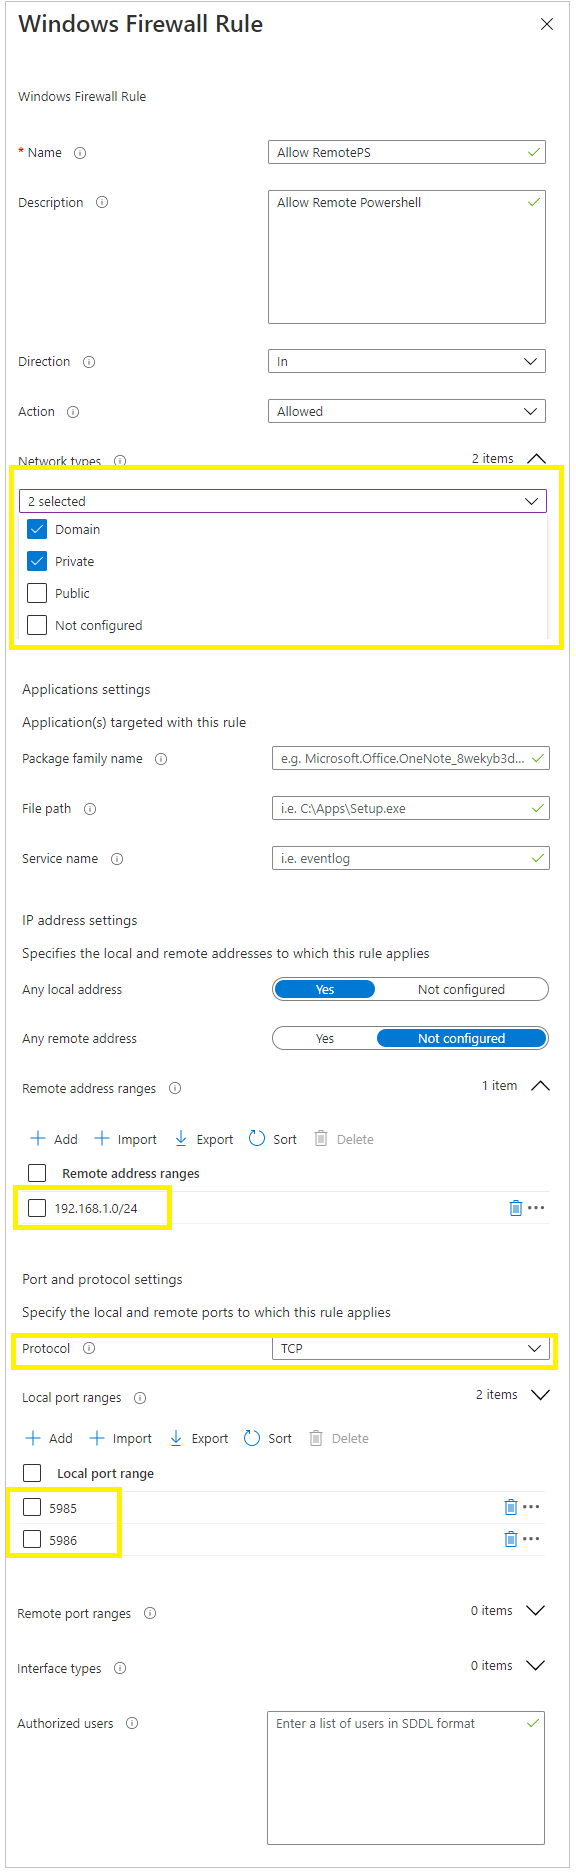
- Once done click Save
- Be sure to assign the rule to your MTR Devices group.
- Then click Review + Create to save the firewall rules.
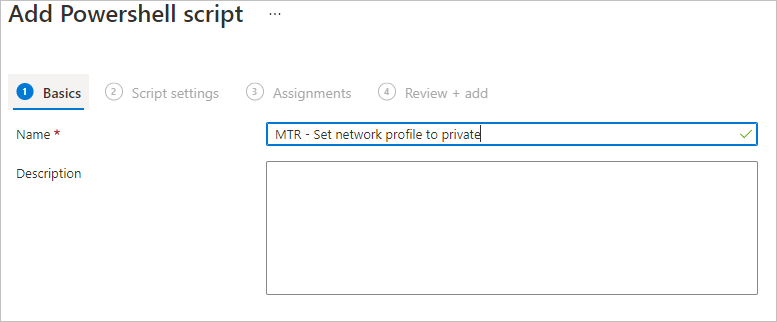
Lastly (You’re almost there!) we need to run a Powershell script on our MTR’s to set the local network connection as private
- Create a .ps1 file with the following Powershell command:
Set-NetConnectionProfile -NetworkCategory Private -Verbose - In the Intune portal, go to Devices > Scripts and click Add
- Give the script a name
- Under Script Settings upload your PS1 file, and leave everything else as default and click Next
- Assign this to your MTR Devices group and click next, then Create to save the script.

- Now you need to wait an hour for the MTR to do its hourly check-in with Intune, download the scripts and apply them!
Updating the local admin password
A common ask is to update the local admin password on each MTR to something other than the default “sfb” password.
This is easily done via Powershell
- Create a .PS1 file with the following lines:
Set-localuser -name Admin -Password (ConvertTo-SecureString -AsPlainText “sfb123!” -Force) -AccountNeverExpires - In the Intune portal, go to Devices > Scripts and click Add New
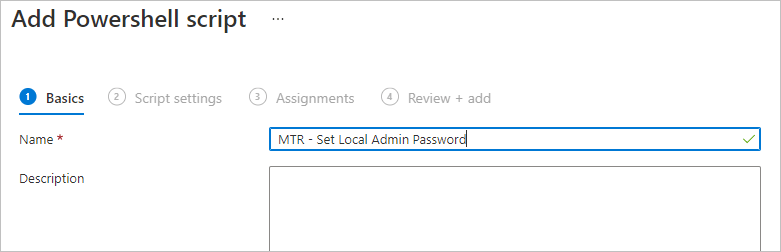
- Give your script a name:
- On the Script Settings page, add your PS1 file, and be sure to select Yes next to Run script in 64 bit Powershell Host and click Next

- Assign the script to your MTR Devices group, and then review and create it.
Be sure to check out the series of posts:
Managing a Microsoft Teams Room (MTR) Device with Intune – Part 1 – Theme
Managing a Microsoft Teams Room (MTR) Device with Intune – Part 2 – Updates
Managing a Microsoft Teams Room (MTR) Device with Intune – Part 3 – Configuration Profiles
Managing a Microsoft Teams Room (MTR) Device with Intune – Part 4 – Autopilot

Craig, I used your script to change the local password but now I cannot get logged in, any ideas?
Double-check the password you’re using to sign in, and that you’re logging in as .\admin